

If you want a flooring upgrade that’s durable, stylish, and DIY-friendly, vinyl plank flooring is one of the best options. As someone who has installed both residential and commercial vinyl flooring, I can tell you the process is approachable — if you understand the proper steps, tools, and techniques.
In this guide, I’ll walk you through exactly how to install vinyl plank flooring confidently and correctly from start to finish.
By the end of this article, you’ll know exactly what materials to use, what mistakes to avoid, and how to get a smooth, professional finish. Whether you’re updating a single room or an entire home, this guide will help you do it the right way.
Why Vinyl Plank Flooring Works So Well
Vinyl plank has exploded in popularity for good reason. It offers the look of real wood with far less hassle. It’s ideal for kitchens, basements, commercial areas, and high-traffic rooms — especially since many versions are waterproof.
Flooring Comparison Table
| Feature | Vinyl Plank | Laminate | Hardwood |
| Waterproof | Yes (most types) | No | No |
| DIY Install | Easy | Moderate | Hard |
| Requires Acclimation | Usually not | Yes | Yes |
| Cost | Low–Moderate | Moderate | High |
| Durability | High | Moderate | High |
| Maintenance | Easy | Moderate | High |
Tools and Materials You’ll Need
Materials:
- Vinyl planks (purchase at least 10% extra)
- 1/4-inch spacers
- Underlayment (if not pre-attached)
- Baseboards or quarter-round molding
- Construction adhesive or finish nails (for trim)
- Caulk for finishing edges
Tools:
- Tape measure and speed square
- Utility knife
- Pry bar
- Rubber mallet & tapping block
- Miter saw or jigsaw
- Oscillating multi-tool
- Broom and vacuum
Step 1: Prepare the Room and Subfloor
Professional results always begin with proper prep.
- Remove existing baseboards and trim carefully with a pry bar.
- Scrape off old adhesive or nails if necessary.
- Clean the subfloor thoroughly.
- Ensure it is dry and level — use a leveling compound if required.
Uneven or dirty flooring is the number one cause of gaps and misalignment later. Taking your time in this step sets the foundation for everything that follows.
Step 2: Plan Your Layout
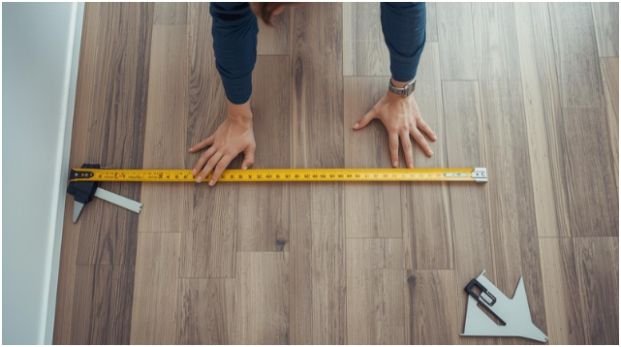
This step separates a beginner install from a pro-quality floor.
- Measure the room in both directions.
- Determine the first wall to start from — usually the longest and straightest.
- Stagger plank seams by at least 6–8 inches.
- Mix planks from different boxes so patterns blend naturally.
I always dry-lay the first row before committing — it ensures visual consistency and prevents awkward cuts later.
Step 3: Lay the First Row
- Place 1/4-inch spacers along the wall.
- Set the first plank down with its tongue facing you.
- Interlock the next plank by guiding the tongue into the groove at a slight angle.
- If you need a shorter plank at the end, measure, score, and snap.
That expansion gap is essential — it allows the flooring to breathe and flex without buckling.
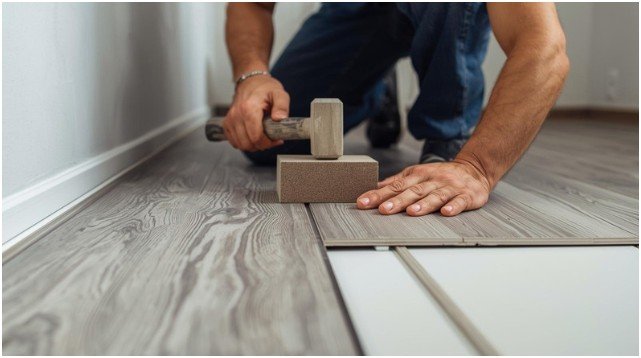
Step 4: Install Subsequent Rows
Now you’re in rhythm.
- Start the second row with a different-length piece to maintain staggering.
- Angle the plank into place and click down firmly.
- Use a tapping block to tighten joints.
If you see even the slightest seam separation — fix it now, not later — because small gaps will only grow over time.
Step 5: Work Around Obstacles
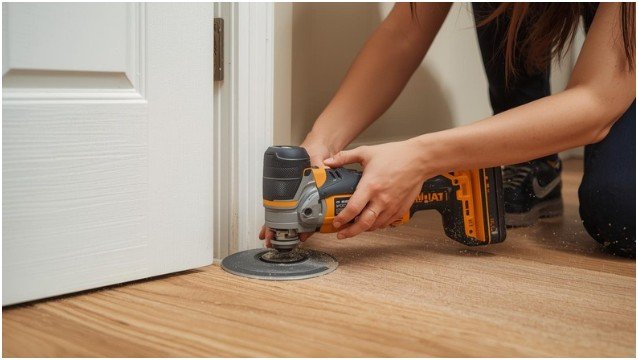
Door frames, corners, and vents require custom cuts.
- For doorways, undercut the trim with an oscillating tool.
- Slide planks underneath for a seamless look.
- Use a jigsaw for cutting curves around pipes.
These small finishing details are what make your floor visually cohesive and professional.
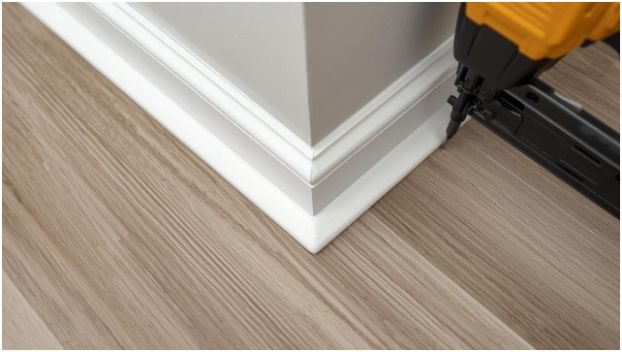
Step 6: Finish the Installation

Once your last row is locked in:
- Remove the spacers.
- Reinstall baseboards or quarter-round molding.
- Attach trim to the wall, not the flooring.
- Caulk edges where needed.
This is where the installation comes together visually, hiding all expansion gaps and giving the floor its polished final appearance.
Common Mistakes to Avoid
Even enthusiastic DIYers often slip up here:
- Not cleaning the subfloor properly
- Skipping the expansion gap
- Failing to stagger seams
- Forcing planks instead of clicking smoothly
- Installing over warped or uneven flooring
- Rushing through cuts and measurements
Avoiding these mistakes is half the battle toward a flawless installation.
Extra Pro Tips for Best Results
- Store planks horizontally before install.
- Install parallel to the longest wall for visual flow.
- In rooms with windows, run planks toward the natural light.
- Never nail or glue floating vinyl planks to the subfloor.
Maintenance After Installation
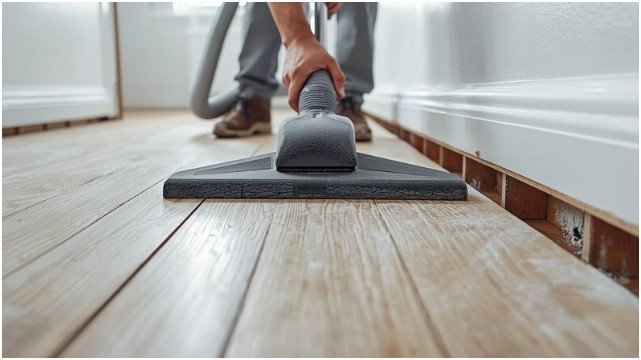
Vinyl plank is extremely easy to care for:
- Sweep or vacuum regularly.
- Damp mop with gentle cleaners only.
- Avoid harsh chemicals or wax-based products.
- Use felt pads under furniture.
With a little attention, your floor will stay beautiful for years.
FAQs About How to Install Vinyl Plank Flooring
1. Do I need underlayment?
Only if your planks don’t already have an attached underlayment or if the manufacturer requires it.
2. Can I install vinyl plank over tile?
Yes — as long as the tile is level and secure.
3. Do I need to glue vinyl plank flooring?
Not for floating click-lock installation. The planks lock together without adhesives.
4. Can this flooring be installed in bathrooms or basements?
Yes. Many vinyl planks are fully waterproof and ideal for moisture-prone areas.
5. Do I have to remove the baseboards first?
It’s recommended, but if you don’t want to, you can use quarter-round to cover the expansion gap.
Final Thoughts
Installing vinyl plank flooring is a rewarding and transformative home project that can dramatically change the feel of a room. It not only enhances aesthetics but also improves durability and comfort underfoot.
With the right preparation, tools, and patient step-by-step execution, anyone can achieve a professional-grade installation without hiring a contractor.
Taking your time, checking measurements twice, and paying attention to detail will ensure your new floor looks seamless and lasts for years.
